This guide is intended to help you set up your Watch Anytime service.
What you need
- You should already have a channel set up with the “Watch Anytime” option enabled. If you don’t have a channel yet, see Set Up a Channel. If you already set up a channel but didn’t enable the “Watch Anytime” option when creating it, please reach out to support@xerb.tv to request them to enable it.
- If you’re collaborating with other Creator(s) to upload content to your channel, they will need to sign up to a Xerb Creator account.
- You and/or the Creator(s) you’re collaborating with should have the video files ready as well as some images as follows:
- A video file in any single-file format (i.e. .mp4, .mov, .avi, .m4v, .mkv, .wmv, etc.). Preferably at least full HD resolution. If the film only exists on physical media then please contact us, we may be able to help.
- A preview image. This is the image that is shown before a user clicks Play on the video, and is cropped to 16:9 960x540px. It does not need to be exact, it can be cropped/resized when uploaded. Note that this is NOT a vertical movie poster.
- A thumbnail. This is shown in previews of the video and is cropped to 16:9 256x144px. However, it can be cropped/resized when uploaded as well. Often people use the same image as the preview image.
Step 1: Add Videos to a Video Library
Please read the information in this page to learn how to add a video to your Video Library. This can be done by:
- You as the Channel Runner to your own Video Library, or by
- Other Creators to their own Video Libraries (they will then submit to your channel).
Step 2: Add Videos to the Channel
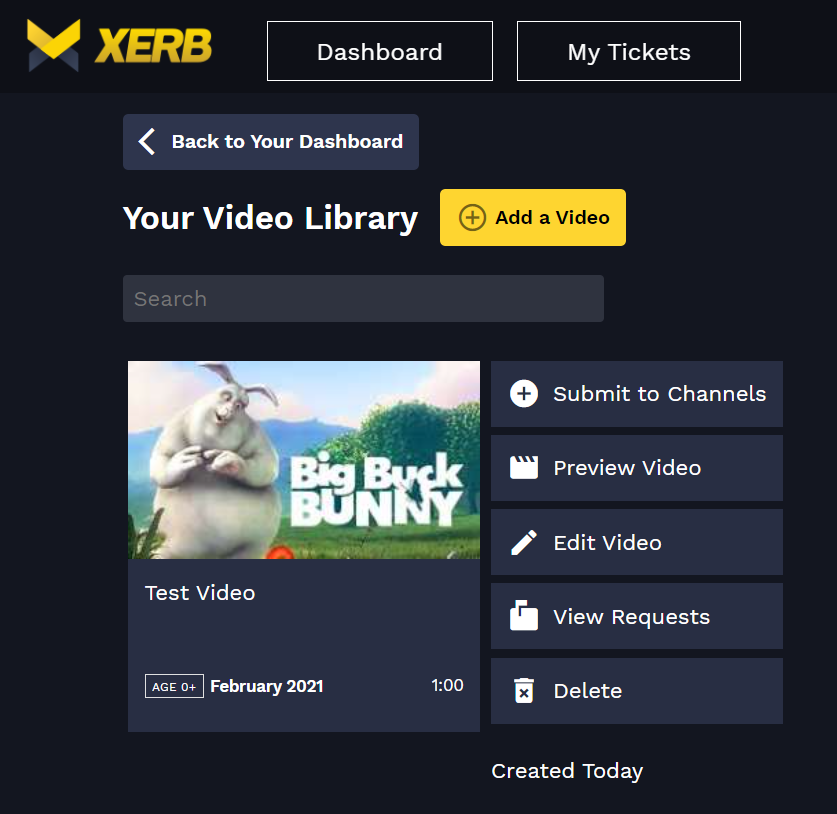
- Once you or the Creator(s) you’re collaborating with have uploaded the videos to their respective Video Libraries, and once they’ve finished transcoding, the person who uploaded said video should go back to their Video Library where they’ll see a new button called “Submit to Channels” next to each individual video. Click on the button for each video your or the Creator would like to add to the channel’s Watch Anytime library.
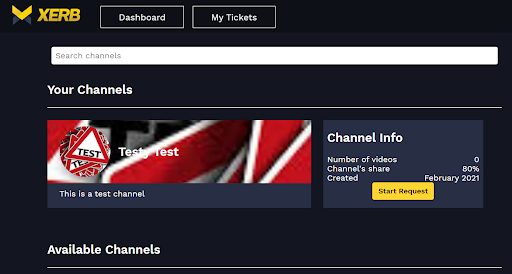
- In the next page a list of the channels to whom you can submit the video will appear. If you’re the Channel Runner your channel will appear at the top, otherwise Creators can use the search functionality to find your channel or scroll down until they find it. Click the “Start Request” button next to it.
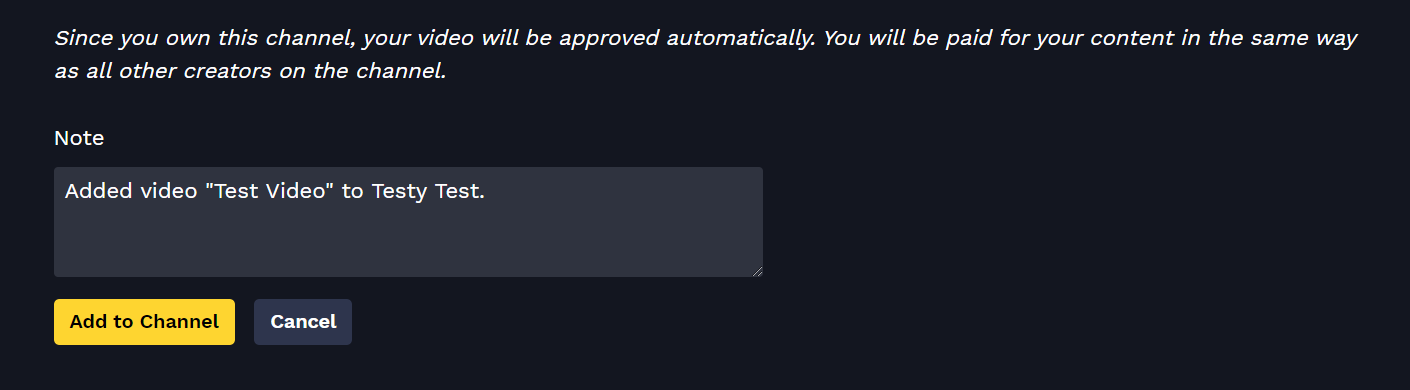
- In this new page, Creators can see the settings you’ve selected for your channel, including price and revenue share. As the Channel Runner, this is the information you input when you originally created your channel. Scroll down to the bottom of the page and click “Add to Channel.”
- If you’re the Channel Runner uploading your own video, the submission will be approved automatically. Otherwise you will receive a notification from the Creator(s) to approve their submission.
- To approve submissions from Creators, go to Dashboard>Requests.
- To check the videos that have been successfully added to your Watch Anytime, go to Dashboard>Watch Anytime Videos, or view them directly on your Channel.

Our Add A Video page has step-by-step instructions for Creators on how to submit their videos to channels like yours. Feel free to share it with anyone you’re collaborating with to populate your Watch Anytime. In addition, from time to time you might receive submission requests from Creators who you’re not familiar with – it’s your choice to accept or reject those requests.
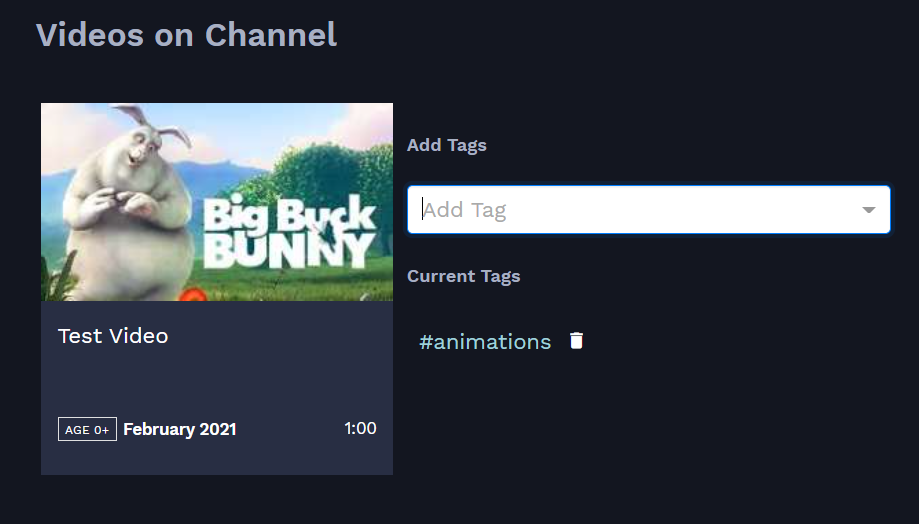
Step 3: Manage Tags
Our “Tags” system allows channels to filter content using custom-made words or phrases to make the watching experience easier for users.
To create your own tags, go to Dashboard>Watch Anytime Videos.
Type the tags you’d like to create under the “Available Tags” section, then click the “Add Tag” button. For example, if you’d like to create a tag called “Animations,” you’d type that in the tags box then hit Add Tag. A list of tags will begin populating above the box as you continue to enter more.
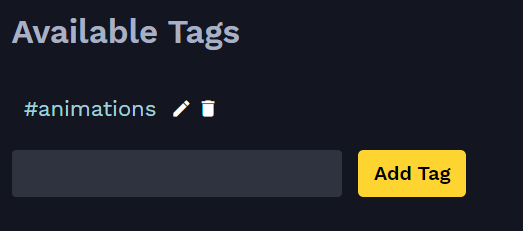
Once you’ve created your tags, you can start categorizing your videos based on them in the section below (same page).
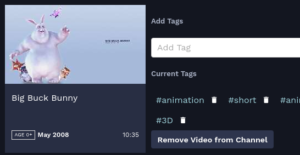
Step 4: Removing Videos from Watch Anytime
Removing videos from your Watch Anytime channel is easy – just go to Dashboard>Watch Anytime Videos, then click on the “Remove Video From Channel” button next to the video you’d like to remove. If this is in Your Video Library, it will not be removed from there, only from the Channel.
Step 5: Review Your Sales Data and Subscribers
Sales data can be viewed under Dashboard>Sales Data. Please note that this shows raw sales information, not the amounts you will actually receive after payment processing and Xerb’s commissions. You can see your total earnings under Dashboard>Earnings, which are calculated monthly.
A list of subscribers can be found under Dashboard>Watch Anytime Members. Here you can see their display names and profile pictures.
Step 6: Editing and Unpublishing Your Channel
To edit your channel, go to Dashboard>Edit Channel. Here you can change your logo, background image, the name of your channel and the description.
Please email support@xerb.tv if you need any of the following:
- Changing your channel’s URL (name changes will not translate into URL changes).
- Unpublishing your channel.
- Updating monthly subscription price, revenue share or trial period.
Questions? Send us an email to support@xerb.tv and we’ll be happy to assist you!